Showing posts with label quilting. Show all posts

Sunday, November 17, 2013

A Modern Quilt Guild Fabric Challenge


Wow.
I can't believe how much time has passed since I last posted!  I've been so busy with work, school starting up again, and of course, sewing and quilting!  I've finished the Breezes pinwheel quilt and just got it back from the superb (and kind of famous) long-arm quilter, Tia Curtis!  This is my first quilt that I haven't quilted myself.  It's also the most complex and intricate quilt I've made, so I wanted to make sure the quilting was perfect, so I sent it to Tia!  I will post pictures of the quilt soon....I need to bind it yet.

I met Tia through the KC Modern Quilt Guild.  I've been a member of the guild for the past several months and I've really enjoyed it even though I haven't been able to participate in any of the retreats or sew ins offered.  That is soon to change, however!  My work schedule is changing and I will soon have Saturdays off which is when most of the sewing events are planned.  That all said, I was able to sign up for a fabric challenge sponsored by Riley Blake and the Modern Quilt Guild.   Each participant was given six fat eighths from their Basics category and told to create anything quilted!  I decided to make a poncho for my littlest daughter, Charlotte.  Drumroll please.....


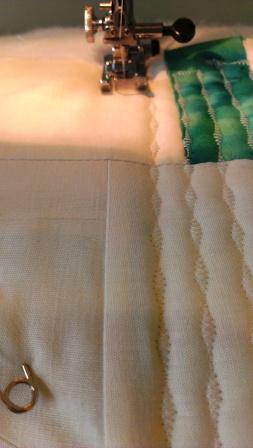
I created the poncho using the slice and insert technique I learned in the Improvisational Piecing Craftsy course I took a few months ago.  I experimented with different quilting styles after it was pieced.  I think it turned out pretty cute and Charlotte is super excited to model the poncho next month at the guild meeting!

Besides binding my pinwheel quilt, I have a lot of projects in the works...mostly Christmas gifts and I've promised to actually make a tree skirt for our Christmas tree this year.  What are you all working on?  

Blog Signature Pin It

Monday, June 10, 2013

Balancing Act

Here is a copy of my latest Free State Quilt Studio blog post:


In my last post I wrote about my daughter's early complaints of summer boredom.  She has had to eat those words.  Since this last post, she's performed at an end of season gymnastics exhibition, spent a week at a Parks and Rec camp, and spent five days (and nights) in the Mark Twain National Forest camping and canoeing!  I'm pretty sure she has had a blast with all these activities, even tipping the canoe in the cold, clear waters of the North Fork River!  I must say, I enjoyed camping and canoeing, too...even though I had no cell phone service, no access to the internet, and had to drive to the "restroom" and "showers."  Anyone who knows me, knows I'm not much of an "outside" kind of person!  And, by the way, camping is A LOT of work!  That said, I did have fun, but I'm glad to be home and I'm anxious to get back into my sewing room in order to finish up the last few of my Improvisational Piecing  Craftsy course.  I've had such an awesome time working on these projects.  I finished my Do Over Quilt the night before we left for our camping trip.  I'm super happy with the results:


Do Over Quilt (Back)

I decided to use a decorative stitch for the quilting.  I would have never even thought about trying that had it not been for the course instructor, Jacquie Gering.  I love the result! I'm excited to bring this little quilt to the next Kansas City Modern Quilt Guild .  Oh, did I mention I joined this Guild?  Well, I finally did it!  I went to my first meeting in May and joined a few days later.  I'm thrilled to be a part of the Guild and I can't wait to get involved! 


I hope you are enjoying your summer so far!  It's been crazy busy for me already....what happened to "the lazy days of summer?"  Nothing lazy about it so far for me...Wallace, however, may have it figured out!


Until next time!

Angela


Blog Signature Pin It

Tuesday, May 28, 2013

Summer Start

The following is my latest post at my new blog, Free State Quilt Studio:


So, it's day three of summer vacation and my kid is already B-O-R-E-D!  Sad huh?  I wish I had 100 days off for the summer!  I'd love to be bored for a few days!  I bet you'd love just a few boring days, too!    

Call me boring, but since my last posting, I've finished up a couple sewing projects and started a few more.  First, I finished my Love Knots quilt.  I haven't quilted yet, however.  I'm not sure I will, actually.  I'm not that happy with it.


Don't get me wrong...I love the concept of this quilt top.  I'm not sure I executed it that nicely, however.  I will definitely try again, but this time I will make sure the fabric triangles I use to flip and stitch are bigger.  That way, I think the end shapes will be more distinct.  Have a look at some of the quilts my Craftsy classmates' quilts completed for the Stitch and Flip class.

I skipped ahead in the class and finished another quilt using Jacqie Gering's Slice and Insert Technique.  I actually signed up the the Craftsy Course because of Gering's Crosscut Quilt.  This is one of my all time favorite quilts ever!


Isn't is AWESOME?!  I love the colors, the architecture of it, and the quilting is amazing!  Now, here is my version:


Not so awesome, but, still, I liked it.  I used browns, rust, and mustard yellow.  These colors, as well as the architectural lines, remind me of the Brady house in The Brady Bunch.  I liked this quilt...until I quilted it.

YUK.  Not happy.

So, ever heard of a mulligan?  It's a "do over" if you flub up a golf stroke.  Here is my Do Over Quilt (top):


I used leftover batiks from my Ocean Waves quilt.  I also scaled back this top.  Each block is half the size of the original.  I also put a little rectangle in the top corner.  Fingers crossed I don't mess up on the quilting!   

So, I've messed up on a few things, but I've learned a lot, too!  I'm having a great time learning these new techniques and I feel like a have a few more weapons in my creative quilt arsenal now.  There are two more quilts to do for the class:  To The Point and Swirling Stars.  I can't wait to get started!  I've also learned that my sewing machine has one of the automatic thread cutter thingies on it!  I've been using my machine since 2007 and never knew it before this past weekend!  

I hope you all are enjoying your summer so far!  It's just the beginning!

Until next time!

Angela

P.S. The top photo is of a gorgeous peony in my back garden.


Blog Signature Pin It

Sunday, October 7, 2012

A Shirt Dress Success

McCall's M4769


Hooray!  I've finished the shirt dress  McCall's M4769!  I'm so happy with how it turned out!  It wasn't all sunshine and roses, however.  All was going well until I reached the collar!  At that point, I nearly threw in the towel!  Honestly, I could not figure it out.  I searched and searched until I found a tutorial for this exact sewing pattern...specifically the lapel collar,  at Pleasant View Schoolhouse blog.  I could NOT have finished the collar without this post!


The picture isn't great, but I'm having major issues with my camera/memory card/computer.  I'm not sure which is the actual problem.  I took the above photo with my iPad.  Later, I took photos using my "real" camera when my daughter was actually wearing the dress.  When I tried downloading the photos from the memory card, it wouldn't work.  Now, the dress and my daughter are gone (back to her house) and I have no way to get those photos again until she visits again and wears the dress!  Trust me, it does look good!  I would recommend this pattern, however the collar is a bit of a bugger.  If you've sewn a notched lapel collar, however, you shouldn't have a problem with this one.  There are darts in the front of the bodice as well as the back, which makes the dress a lot more fitted than it appears in this picture.    There are pockets in the skirt and the sleeve bands are a bit flared.  When I make this pattern again, I will use contrasting fabric for the sleeve bands and maybe the skirt or the bodice since they are separate pieces that are sewn together!

I've also finished my latest quilt top.  I used  Little Black Dress.  I bought a jelly roll and used strips from it as well as strips I cut from plain black fabric yardage.  Again, this picture was taken with my iPad.  I will post more once I sort out my computer problem.


I based this pattern after I saw a similar quilt in a Keepsake Quilting catalog.  I think it turned out great!  Now, I just need to figure out the fabric for the back, the binding, and then get quilting it!  Shh, this one is for my oldest daughter's upcoming birthday.  Hope she likes it!

Tootles!     

Blog Signature Pin It

Sunday, August 5, 2012

Love Potion No. 9


Number 9 is here!  That's baby number 9 for my cousin and his wife!  Can you imagine?  Anyway, I have been working on Number Nine's quilt for the past few weeks.  And now it is finally finished just in time for the baby's arrival this morning!  I made this quilt using Vintage Modern Mini Charms from Bonnie and Camille as well as white and red 2 1/2" squares in order to create the Disappearing Nine Patch blocks.


The finished quilt measures 36" X 52."   It is squishy perfectness!  Well, it's not perfect.  Some of my squares didn't match up perfectly, but hey, it's a handmade gift made with love!


I quilted using my free motion foot.  This was only the second time I have done this, but I find it kind of relaxing.  Once you get into a "groove," it's fun and easy!


Number 9 has been the most intricate and detailed quilt I've completed thus far.  It was frustrating at times, but I am proud of myself for designing the quilt and figuring out all the MATH involved in order to calculate how much fabric I needed as well as how to actually construct the blocks.  Considering this is literally the NINTH quilt I've made, I think I'm doing alright!

Congratulations to Matt and Stephanie!  You are great people and great parents!  Best wishes to you and your family, including little Number 9!

Blog Signature Pin It

Sunday, July 8, 2012

Ocean Waves Quilt: DONE!


Here is my finished Ocean Waves Quilt!  I'm in love with it!  It is difficult to capture how delicate the colors are in a photograph.  I used batiks from the Ocean Waves Fat Quarter Collection I got from Fat Quarter Shop.  Hop over and have a look at the entire collection!


I used a darning foot on my machine and did a meandering quilting design.  I've never done this on such a large scale before.  I had to practice a bit first.  I used invisible thread on my quilt, but I used white on my practice pieces.


I was intimidated at first, but once I got in a "groove" I felt great.  I think it turned out pretty nice and will definitely be meandering my way through my next quilts!  


I cannot wait to finish redecorating my bedroom!  I will be hanging this quilt on the wall opposite my bed.  It's going to look awesome!

I hope you all have had a fantastic weekend and wish you all a terrific week!   


Blog Signature Pin It

Wednesday, May 30, 2012

Ocean Inspired Fabric and Quilt Blocks


I'm so thrilled to have received my Ocean Waves Batiks fat quarters a few days ago!  I fell in love, again, with the collection after opening the package.  They are beautiful!  I've been searching the internet and books, including 5,500 Quilt Block Designs by Maggie Malone, for a quilt pattern using these fabrics.  I want to use a block design that makes the fabric appear to be moving...like a wave.  I came across the Snail's Trail and the Journey to California blocks. 

Snail's Trail Block from About.com
The blocks look very similar.  I think they look pretty "wave-like," but if I could only use the "top" of the block.  Hmmm.  Here is what I've come up with:


I've been cutting up my scraps for several days so I had a bunch right in front of me to experiment with.  I used 8 blue squares and 2 off-white squares plus 5 half square triangles.  The block that ends the wave was the hardest for me to figure out.  I haven't made anything like this square before.  Here is my sketch on graph paper (drawing on graph paper makes me a real quilter now huh?):


I'm not sure what this "special" square is called, or even if it a real design.  Basically, it's a blue triangle sewed to two smaller, one blue and one off-white, triangles.  I decided on a 16 patch block.  It measures at 14 inches completed.  I think I'll stick with this size, but now I need to decide the design for the overall quilt. I have 12 batik fat quarters to work with and have purchased a white on white solid to use as well.  Any ideas?  

I mentioned earlier that I have been cutting up my scraps for the past several days.  I started this project while cleaning up and cleaning out my sewing room, AKA my studio.  My fabric stash was so disorganized!  I'm not nearly finished, but I did come across some fabric I forgot I had.  Before I knew what a charm pack was, a friend gave me one.  It is called, Wildflower Serenade.  It's from Moda.  I decided to use up these charms to make a table topper for my friend who gave me the fabric.


I made the center heart applique using cut up charms and fusible web.  I "quilted" the heart with off-white thread.  I quilted the rest of the piece with clear thread.  I had several four patches leftover, so I made a hooped wall hanging to match.  I bought the wooden hoop for $1.00!  


I hope everyone is enjoying the beginnings of summer!  I have several sewing projects in the works, including a couple of vintage dresses for my oldest daughter, a blouse for me, and more skirts for my littlest daughter.  I'm also going to tackle a baby Jon Jon for my cousin's newest little one!  I cannot wait to start on my Waves Quilt!  I am thinking that project will go to the top of my list! 

Tootles!

Blog Signature Pin It

Friday, May 11, 2012

Another Lesson Learned


Today is my mom's birthday.   With her birthday so close to Mother's Day, it makes this time of year especially difficult.  She died seven years ago.  I miss her so much everyday.  She was my best friend.  I am lucky, though, that I have some special ladies in my life that I consider like mothers to me.  I made the red Friendship Star/Disappearing Nine Patch table topper for one of those ladies.  I made another quilted topper for another.  I used the fat quarters I won from Annie's Ruby Slipperz.


My Aunt Pat loves bunnies and her home is decorated with very light pastels and romantic flowers.  These fabrics were perfect!  The topper I made measures 18" X 18" (finished).

Post Washed

The bunny image had printed so beautifully onto my fabric, but when I washed it, it almost disappeared completely! I could have cried.  I scrambled researching how I could fix it.  In the end, however, I decided the faded image just made the piece look more authentically vintage.

Pre-Washed
Pinwheels were a first here and I think they turned out pretty nice.  I also think the fabric is fabulous...love it!


I've learned a lot during my brief quilting journey.  The lesson here:  Make your fabric color fast BEFORE printing on it!  This only applies if you are printing directly onto regular fabric using freezer paper and you are going to wash your quilt.  (You might not feel it necessary to wash a wall hanging; like my Octopus Wall Hanging).  I believe if you use products designed for transferring images, that fabric is already treated.  I've done computer research and I have discovered that if you use something called Bubble Jet Set, you can use your own fabric and the freezer paper method.  I'm off to find that product and will give it a try!

Happy Mother's Day to all you moms out there and all those "like" moms, too!  And Happy Birthday Mom.  

Tootles!
Blog Signature Pin It