Sunday, October 7, 2012

A Shirt Dress Success

McCall's M4769


Hooray!  I've finished the shirt dress  McCall's M4769!  I'm so happy with how it turned out!  It wasn't all sunshine and roses, however.  All was going well until I reached the collar!  At that point, I nearly threw in the towel!  Honestly, I could not figure it out.  I searched and searched until I found a tutorial for this exact sewing pattern...specifically the lapel collar,  at Pleasant View Schoolhouse blog.  I could NOT have finished the collar without this post!


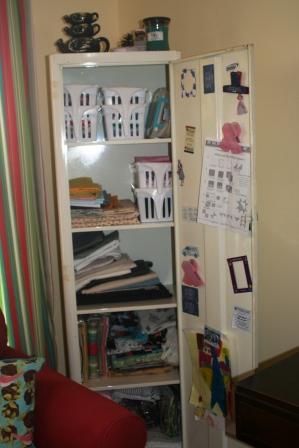
The picture isn't great, but I'm having major issues with my camera/memory card/computer.  I'm not sure which is the actual problem.  I took the above photo with my iPad.  Later, I took photos using my "real" camera when my daughter was actually wearing the dress.  When I tried downloading the photos from the memory card, it wouldn't work.  Now, the dress and my daughter are gone (back to her house) and I have no way to get those photos again until she visits again and wears the dress!  Trust me, it does look good!  I would recommend this pattern, however the collar is a bit of a bugger.  If you've sewn a notched lapel collar, however, you shouldn't have a problem with this one.  There are darts in the front of the bodice as well as the back, which makes the dress a lot more fitted than it appears in this picture.    There are pockets in the skirt and the sleeve bands are a bit flared.  When I make this pattern again, I will use contrasting fabric for the sleeve bands and maybe the skirt or the bodice since they are separate pieces that are sewn together!

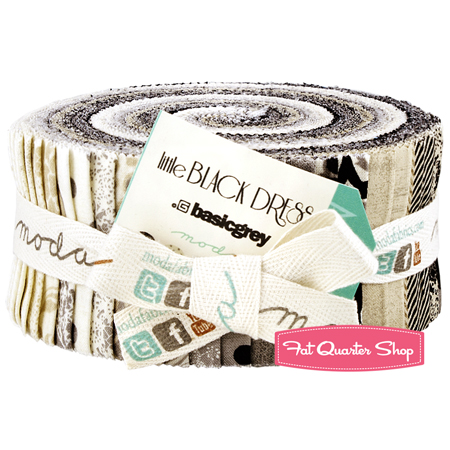
I've also finished my latest quilt top.  I used  Little Black Dress.  I bought a jelly roll and used strips from it as well as strips I cut from plain black fabric yardage.  Again, this picture was taken with my iPad.  I will post more once I sort out my computer problem.


I based this pattern after I saw a similar quilt in a Keepsake Quilting catalog.  I think it turned out great!  Now, I just need to figure out the fabric for the back, the binding, and then get quilting it!  Shh, this one is for my oldest daughter's upcoming birthday.  Hope she likes it!

Tootles!     

Blog Signature Pin It

Wednesday, September 19, 2012

Lessons in Dressmaking


So, I here is what I have learned from my most recent fashion sewing project:

  1. DO NOT CUT THE PATTERN TO THE SIZE YOU THINK IT SHOULD BE!
  2. EXPERIMENT ON SCRAP FABRIC WHEN MAKING BUTTON HOLES!
  3. DO NOT CUT THE PATTERN TO THE SIZE YOU THINK IT SHOULD BE!
  4. SEW THE GARMENT USING CHEAP FABRIC; IF IT TURNS OUT, USE YOUR FASHION FABRIC!
  5. DO NOT CUT THE PATTERN TO THE SIZE YOU THINK IT SHOULD BE!
Did I mention NOT TO CUT THE PATTERN?  I made this mistake when I began cutting out the pattern pieces for See and Sew B5634.  I decided cutting the pattern to the size I thought would fit my oldest daughter would be easier than trying to fold the pieces along the appropriate lines.  Well, it was easier, but in the end, the dress did not fit her!  Too small!  Fortunately, it fit my friend and she modeled it for the photos.


You can see in the photo where I violated lesson #2.  The second button is clearly misaligned.  Oops.  What's also obvious is that I paid no heed to lesson #4.  I should have made the dress using cheap fabric first! 


I actually learned a lot from this project that helped me make the next dress.  I had never made a collar before!  It was much easier than I expected!  Setting in the sleeves was a bit tricky, but I managed, and I carried this experience into the next dress project.


My daughter's favorite kinds of dresses are shirt dresses and wrap dresses.  I messed up the shirt dress, but I scored with this blue wrap dress.  Actually, I did not intend to use this blue fabric for the actual dress.  This is cheap fabric I used to "practice" the pattern.  My daughter saw the dress, tried it on, and decided she liked the fabric!  Hit!  She wore the dress to work!  If you are interested, this wrap dress pattern is from Sew Simple.  I picked it up at Walmart.  Easy!

So, with all these lessons learned, I'm now ready to attempt the shirt dress again.  This time, I'm going to use McCall's M4769.  I think the fuller skirt will fit my daughter better than the See and Sew pattern.    


I'm using this retro looking fabric for this dress.  I bought this at Quilts and Quilts, my favorite quilt shop  in  Branson, MO.

  
I also bought some "self-ruffling" yarn called, Flounce.  I had never knitted with this sort of yarn before so it was a little weird to get used to, but I managed to follow the directions and make this adorable little scarf!


I'm thinking these little scarves would make great teacher gifts this year!  They are very fast and the stitches are very forgiving!  If anyone is interested in a quick knitting lesson, let me know!  I'll post an easy tutorial!

I also bought a few Jelly Rolls at the quilt shop!  I've already begun work on a quilt using one of them!  I can't wait to show you!  Stay tuned!

Tootles!
Blog Signature Pin It

Sunday, September 9, 2012

A Look Ahead


It seems summer may actually be over.  There is a definite chill in the air this morning and football season officially kicks off this afternoon!  That means making a pot of chili, curling up together on the couch and watching the Chiefs lose play.  I love summer, but, if I'm honest, this summer has been brutally hot and dry.  Sleeping with the windows open and getting to snuggle up under the bed covers is a real relief.  It's also a great relief on our air conditioner...and the a/c bill!

Don't get me wrong, this summer has been great.  My family and I have taken a few great trips and gotten to spend quality time together. We've biked, golfed, gone fishing and done a lot of swimming!


Summer being over also means "back to normal."  Back to school, homework, 8:30 bedtime, and routine.  Another definite need in my family.  Personally, I'm feeling more normal, too.  It has been nearly one year since my total knee replacement surgery.  Time flies, huh?  They said it would take a year (or so) to feel like the surgery was worth it.  They were right.  My knee is feeling great!  I've got a lot of the flexibility back and the joint is feeling less mechanical and more like a normal knee!

I'm looking forward to cooler weather now and getting back in my sewing room.  I've completed a few projects in between summer activities, including sewing two dresses for my oldest daughter and a skirt for my youngest.  The lessons I learned from this dressmaking will be the subject of my next post!  Here is a sneak peak at a few of my latest projects.


I am super excited about my quilting projects I am planning.  I have the fabrics for two of them and am in the planning stages for what I want to do with them.   I can't wait to show you!

Have a fabulous fallish Sunday!  I've got to start on the chili!   Tootles for now!

Blog Signature Pin It

Wednesday, August 29, 2012

Busy Busy


Just a quick note to let you know that I am still alive and well.  I've been so busy with my day job, one kid off to her first year at college, the other back to college to begin her third year, and second grade starting for my little one!  Poor daughter, Alex, must feel left out!  She graduated from college last December, so I don't have to "get her ready" for anything anymore!  Well, I still take care of her...or at least I try!  I'm kind of a helicopter mom if you didn't already know that!  Oh, and there are three new family pets we have acquired...two fish and a Chinese Dwarf Hamster!  Anyway, I have also been working on a few garment sewing projects, including two dresses and a skirt.  I will upload photos as soon as I can.  So, stay tuned!

In case you are wondering, the above image is of a One Armed Paper Hanger.  I remember the day I first heard this saying, "I've been busier than a one armed paper hanger!"  I was 17 and had no idea what that meant.  My English "mom" uttered this saying and I questioned her repeatedly as to it's meaning!  Maybe it was just her accent!  She still teases me about it years later!

Thanks for sticking with this busy gal!  I promise to get by your blogs ASAP!

Blog Signature Pin It

Sunday, August 5, 2012

Love Potion No. 9


Number 9 is here!  That's baby number 9 for my cousin and his wife!  Can you imagine?  Anyway, I have been working on Number Nine's quilt for the past few weeks.  And now it is finally finished just in time for the baby's arrival this morning!  I made this quilt using Vintage Modern Mini Charms from Bonnie and Camille as well as white and red 2 1/2" squares in order to create the Disappearing Nine Patch blocks.


The finished quilt measures 36" X 52."   It is squishy perfectness!  Well, it's not perfect.  Some of my squares didn't match up perfectly, but hey, it's a handmade gift made with love!


I quilted using my free motion foot.  This was only the second time I have done this, but I find it kind of relaxing.  Once you get into a "groove," it's fun and easy!


Number 9 has been the most intricate and detailed quilt I've completed thus far.  It was frustrating at times, but I am proud of myself for designing the quilt and figuring out all the MATH involved in order to calculate how much fabric I needed as well as how to actually construct the blocks.  Considering this is literally the NINTH quilt I've made, I think I'm doing alright!

Congratulations to Matt and Stephanie!  You are great people and great parents!  Best wishes to you and your family, including little Number 9!

Blog Signature Pin It

Saturday, July 21, 2012

A Little Summer Sewing


I've finished another skirt using Butterick 4722.  My daughter picked out this cute fabric at Joann's several weeks ago.  It's cute, but it's directional!  I didn't realize this until I was about to cut out the pattern pieces. Luckily, I noticed the direction and made adjustments to the pattern pieces.  It wasn't difficult, but I had re-think how to lay out the pieces.  


This is the second  skirt I've made using this pattern.  Several weeks ago I made one using a blue Hawaiian-like batik.  It's a dead easy pattern!  It's perfect for a simple summer skirt for your little Princess!


Maybe I should say, "Diva!"  I've got a few more summer sewing projects in the works for this little Diva, including a halter top!  For now, though, I'm off to work on my mini charms project.  I'm hoping to finish it up this afternoon!  

Have a great weekend!

Blog Signature Pin It

Wednesday, July 18, 2012

Sew Loquacious's First Gluttonous Recipe


It's weird.  Whenever I'm on a diet my attention seems to gravitate toward all things FOOD!  The badder the better!  I've been pinning recipes on my Pinterest Recipes board like crazy!  I've also been digging through my recipe collection, as well as my mother's old recipe box.  Not to mention watching my favorite Southern cook, Paula Deen on television!  I've also been a little preoccupied by Christmas crafts, decorating, and baking.  This all leads to the recipe I want to share today.  I've made Beer Bread for the past several years at Christmastime.  I make loafs for my family and I also give them as gifts.  I've used a million different beers to achieve different tastes, but I've never made a sweet loaf until now.  Here is my simple recipe for  Streusel Topped Cinnamon Beer Bread:

Basic Beer Bread Recipe:
3 cups self rising flour
1 can of beer (12 oz can or bottle)
3 tablespoons of sugar (granulated/white)
and these ingredients to make it sweet:
1/2 teaspoon cinnamon
1 teaspoon vanilla

Streusel Topping:
1/2 cup flour (regular)
1/4 cup brown sugar (or 2 tablespoons Splenda Brown Sugar, which makes this less gluttonous right?)
1/2 stick of butter
1/2 teaspoon cinnamon

Glaze:
1 cup powdered sugar
1 tablespoon milk or water
1/2 teaspoon vanilla

Preheat oven to 350 and spray a loaf pan with non stick spray.
Combine the beer bread ingredients and mix.  It will be think and dough like.  Place into loaf pan and bake for about 20 minutes.  Make topping.  Remove from the oven and sprinkle streusel topping crumbles over the top.  Bake another 20 minutes.  Make glaze.  Remove from oven and drizzle with prepared glaze.


This bread is very much like a coffee cake, but a lot heavier. It's also very dense.  I used Bud Light when I made this loaf.  Different beers will affect the flavor as well as the color of the bread.  Adding melted butter to the top of the bread before adding the streusel topping will help to brown up the top.  I think adding fruit, like apples or raisins, to the bread batter would be great.  Also, adding streusel crumbles to the inside of the bread, like a swirl, would also taste yummy and maybe a little lighter.  If you give this recipe a try, let me know.  I'd love to hear your feedback!


In my last post I gave you a little sneak peak at my current quilt project.  Here is an even bigger peak!  Yes, those are six inch blocks I've made using the Vintage Modern Mini Charms I won from Jolly Jabber!  I've got 34 blocks finished and 20 more to go!

You might have noticed I changed up my blog a bit.  I think it looks a little more streamlined.  What do you think?  I'd love to know!  

Tootles!

Blog Signature Pin It

Saturday, July 14, 2012

Where I Create: Organized...for now.


Guess what?  I've finished cutting, sorting, and organizing my fabric scraps!  Look how clean my work desk is!  The only little pile on my desk is the beginnings of a new project.  More on that later.  First, here are my scrap bins, mostly organized by color.


I've placed my quilt fabric scrap squares in the white bins on the top two shelves.  I've also placed yardage on the second shelf.  On the bottom shelves, I have fabric for bags, purses, and clothes.  Here's a look around my studio.  It's usually not this tidy!


I love it when it is clean and organized!  By the way, all of the furniture in my studio, except the red chair, is from thrift  shops.  The white cabinet with the laminated top is a vintage kitchen cabinet.  It even has a bread drawer!

Now, what project have I started?  Here's a clue; I'm using these:


These are mini charms I won from the The Jolly Jabber, the The Fat Quarter Shop's blog.  The charms are 2.5" and are from the Vintage Modern Collection.  They are adorable!  I can't wait to show you what I'm making with these!

Hope you all are having a great weekend!

Blog Signature Pin It