Showing posts with label Nancy Zieman. Show all posts

Sunday, February 5, 2012

My First Quilt: DONE!


It's done!  I worked all week on it and finished up my first quilt Saturday night.  I ran into a few hiccups along the way, but overall I'm happy with how it turned out.  My hiccups?  First, I tried basting the quilt sandwich using Heat N Bond "tape" as described by Nancy Zieman in Sewing A to Z .  This did not work.  I guess my sandwich was too thick to heat all the way through.  I went out and bought basting spray.  It rocks!  Problem solved!  The second problem...the yellow flag, above the bird, frayed and came away from the satin stitched edge when I washed the quilt. I tried "patching" the spot, but, to me, the flaw is obvious.  I'm still glad I started my quilting journey with applique.  Next time, however, I will cut my pieces a little larger and make sure to watch all fabric prior to cutting and sewing!  

Even with the flaws, I'm still happy with it...and pretty proud of myself for quilting it myself!  All those (straight) lines!  I didn't use my new walking foot for the quilting, but I did use the transparent thread I bought.  Wow.  It is like fishing line!

Quilt back (closeup)
I folded the back fabric over to the front and used it for the binding.  I found this method pretty easy and will use it again for my next quilt!  
Fold over binding
So, what do you think?  Thanks again to Polly at Helping Little Hands for the great Bird and Bunting Quilt Tutorial.  Any good ideas for what I should do for my next quilt?  I'm on the hunt for another great pattern!

Have a great week!
Tootles! 

   Blog Signature Pin It

Sunday, June 5, 2011

Adjustable Fabric Strap Tutorial Update

It seems like ages ago that I wrote my first sewing tutorial.  It was actually in March last year that I posted a tutorial based on Nancy Zieman's adjustable fabric straps for purses and bags.  I hadn't realized until relatively recently that many crafters have come to my blog and some even became "followers" after seeing my tutorial on other websites and blogs, including Craft Gossip and Totally Tutorials.  So, I'm really grateful to those sites and others for re-posting this tutorial.  I'm also thankful to Nancy Z. Without watching her show on my local PBS channel, I'm not sure I would have even thought that I could make my own purse, let alone adjustable straps.  She is my sewing hero.

So why am I talking about this tutorial?  Well, over the past year, a few people have emailed me in frustration regarding the instructions.  I've tried to explain the steps via email to them, but I'm afraid these steps are best understand through pictures.  I'd actually like to make a video and post it, but I'm certain I'm not to that level of blogging just yet!  Carla is one of those frustrated emailers.  Instead of trying to explain the steps in an email, I've decided to re-do some of the steps that are probably the most confusing and write an "updated" tutorial here.  Please note that I have used fabric scraps and haven't even used matching scraps for the slides.  I also have not used interfacing here, which is actually really important for successful adjustable straps.  Please review the original tutorial for more detail regarding measurements, interfacing, etc.  Let's get to it!

1.  I first cut two pieces of fabric 2 1/2" wide X 18" long.  You will also make two fabric slides.  You'll want these a half (or more) narrower than your completed straps.  You'll need to make sure you make them long enough to cover the width of the strap plus 1/4".


2.  Next, I folded and ironed the long ends toward the middle.  I did this on both straps.  NOTE:  You would iron interfacing to the long pieces before folding if you were making actual straps for your bag.  Again, the interfacing you use here is really important.  Here's an inside secret:  I always use Dritz Perfect Waist Maker instead of regular interfacing for my bag straps.


3.  Now fold over your strap in order to find the middle.  Press to mark this spot.


4.  Now, just below this fold, open the strap and measure.  You are going to make your fabric slides about 1/4"  longer than the width of the opened (and NOT sewn) fabric strap.  In the second photo below, I'm pointing to where I will cut the green slide fabric.


5.  Now, on the right side of the strap fabric (brown), pin the slide fabric (green) cut end to cut end.  Sew the fabric slide to the strap fabric just where you see the pins.


6.  Once you have sewn on the slide, refold the long sides of your strap and press.  Now, with wrong sides together, fold your strap in half.  You will now edgestitch the strap.  Sew down one long end and when you reach the fabric slide, stitch close, but do not sew over it.  Then, sew down the other side of the strap.  I've used green thread for this step in hopes you can see the stitches.  In the last photo in this step, I am pointing to where I sewed across the strap near the slide.


7.  Repeat the steps in order to make the second strap.  It should look exactly like the first!


8.  Now you are going to "stack" the slides.  To do this, lay one strap with the top of the slide up.  Take the other strap and lay it with the slide touching the table surface, or down.   Look at the above photo and imagine the slide on the first strap was facing down.  This is the position you'll want in order to insert one end of one strap into the slide of the other strap.  Repeat for the other end.


If you've done this correctly, one slide will appear "upside down."  In other words, you'll see the backside of one slide while the other will appear "right side."  Now just attach your strap, which is now just one (you started with two), to your bag in whatever method you want!

I hope this all makes better sense.  Study an old purse or bag that has an adjustable strap in order help you get a visual perspective, which is sometimes hard with only photos and words.


Signature for Blog

Monday, May 10, 2010

Sew, What's Up?

Hi everyone! I hope everyone had a terrific Mother's Day...whether you are a mom or not! Wow, I've been sew busy (at work) that I haven't been able to get much done in my sewing lair since my last post about Nancy's bag templates. I did manage to finish the bag, but, sorry, I don't like it. I guess it is my own fault for altering the pattern, but I wanted to try making the purse strap adjustable by making it like a belt. I think the strap actually turned out good, but it doesn't "fit" the bag itself. It just doesn't look right on it. I definately like the strap and the hardware. Besides, I got to hammer the eyelets...is there a better way to relieve stress? Well, okay, I can think of some other ways, too!

Besides finishing this "Nancy Z" bag, I also made a top and skirt using some of the fabric I scored during my last Flea Market Friday. I think the outfit turned out super cute and my diva daughter loves it!

May has proven to be a busy month for me. I feel like the month is literally flying by. I have a lot of projects on my to do list and I hope to actually get half of them done. Cyndi at Bluebirdswing is having a busy month as well, but she is having an awesome giveaway on her blog. This month she is giving away some super fabric! I won her April giveaway and scored a terrific purse, wallet, key holder, and journal!


One last thing...even after the halter(s) fiasco, I still haven't totally given up on my quest for my own halter top. Maybe it's because I turned the big 4 0 a few weeks ago and I think wearing a halter somehow makes me younger?? Well, without any more attempts at pychological self-diagnosis or rather, denial, I might try another pattern. I found this one at Cut Out and Keep. It's called a Batwing halter made from a triangle.. check it out at Cut Out and Keep. Seems easy..right?
Angela


Tuesday, May 4, 2010

Sew Why the Template?


Try it before you buy it Tuesday
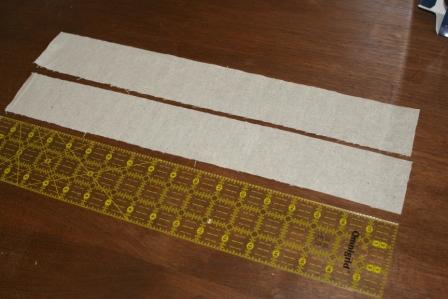
As you already probably know, I am a huge fan of Nancy Z. I actually consider her my sewing hero. Sew, what I have to say now is hard. "Nancy, I'm not a big fan of the Trace N Create Bag template." Sorry. I think the concept is cool, but I'm really not sure that I needed to spend $20.00 for this sewing tool. Of course, I did buy the "City Bag" template. I might have liked the California collection more, but the idea for both is the same. The City Bag collection is one template that allows you to create one of six styles of bags. I'm making the simplest: The Portfolio. Basically it is a just a rectangle. I started by cutting a 13 X 18 rectangle of my outer fabric as well as the lining fabric and interfacing. Next, I placed the template on half of one of the interfaced fabric pieces and traced around the blue outer lines and the mark for the magnetic snap placement. I then flipped the template upside down and traced the same on the other half of the fabric. Finally, I cut at the line I drew. Well, tried to draw. I found it difficult to mark on the interfacing. I used a blue fabric pencil. This did not work well on the interfacing.
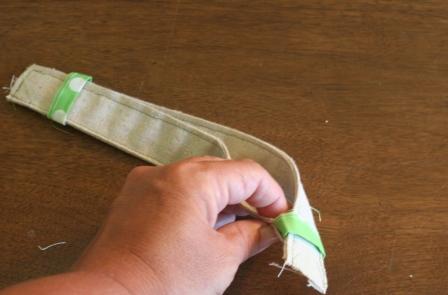
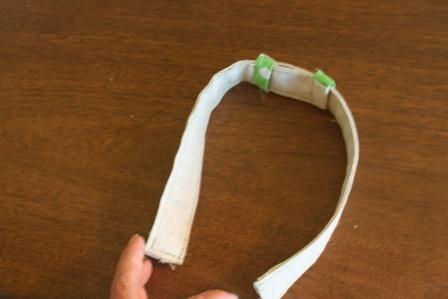
I followed these same steps for the lining. My pencil worked better here. I made some changes to this pattern. First, I decided not to follow Nancy's pattern for the straps. Instead of cutting out two 2 X 44 strips and eventually attach cross grain ribbon on both (what? really?), I cut mine about 3 1/2" wide by 53" which was the length of the fabric. I haven't decided how long to make the straps yet, so I cut them at that length. I think I am going to try out my eyelet tool and make the strap into a "belt." That sounds cool huh? But I transgress, I mean digress. Back to the template...the second change I made was to box the corners of the Portfolio Bag. The template allows for boxed corners for the other styles, but does not indicate this for my bag. Sew, I decided to box mine. Here is the bottom line for this template: If you just want to sew a simple square or rectangle tote or bag, you don't need the Trace N Create Template. Maybe if you are making a more complex bag, or making numerous bags of one style, you might consider this tool. Oh, the template doesn't indicate how much fabric to purchase either. Sew, why not just buy a cool pattern that advises amount of fabric needed as well as notions?

What is your answer to the bird question? Why do birds fly in a V? I ask this question because the birds chirping in the morning (loudly, I might add), remind me to look up when I'm outside. Every time I observe birds flying in this pattern I laugh. One of my mother's "jokes" was: "Why is one side of the birds' V flying formation longer than the other?" Her "targets" would ponder this as some scientific challenge question. Most would come up with elaborate theories of bird behaviour, etc. She'd laugh and say, "Why it's because there are more birds on one side!" Cheesy no? Yes, super cheesy, but that was my mom. Mother's Day is coming up and honestly, I didn't even realize this until last night. My mom, a real super hero, passed away five and half years ago. I miss her terribly. Happy Mother's Day to all the moms out there...you are all heroes.
Angela

Tonight: Trace n Create Bags

Hi everyone I am busy at work on a new bag using Nancy Zieman's Trace n Create Bag templates by Clover.  I have already sustained a minor burn to my ring finger, but all and all, things are going well.  I will be posting a "quasi" review of the templates later tonight.  Sew, come back later and check it out!

In the meantime, here's an age old question to ponder:  Why do birds fly in a V?

Angela

P.S.  I want to thank the ladies at Sew What! for posting my adjustable fabric slide tutorial!  There are a lot of cool tutes on their site.  Check it out!

Sunday, March 28, 2010

Tutorial Posted!

I am so excited that my adjustable fabric strap tutorial has been posted on Totally Tutorials!  Thanks to all who have followed their link to my blog!  I hope that anyone interested in making these adjustable fabric straps will view my tute and, if there are any questions, or something isn't clear, please email me with your questions or comments!  This was my first tutorial.  I hope to write many more, so I want to make sure that my instructions are clear. 

Thanks again to Totally Tutorials www.totallytutorials.blogspot.com and also a big shout out to Nancy Zieman

Angela

Friday, March 5, 2010

A Tutorial....Finally


Well, I wrote a tutorial today about making an adjustable purse strap using fabric slides. I followed Nancy's steps to the letter, except for the length, and the strap turned out great! I'm not sure my how-to explains the process as descriptively as Nancy does in the 12 Easy Sew Bags episode I've watched over and over (and over) again, but I think it comes close. The bag I made (red and khaki plaid) is not from a pattern, although I did use Simplicity pattern #2830 for the size and shape, but the design is my own.
I used this same Simplicity pattern for size and shape for another bag I made this fall. I used bias tape on this bag, which was a first. I really like how it turned out. It is the black and white bag shown above. (I wish I could find a tutorial on how to add photos to posts)
Have a look at the how-to and let me know what you think. I've also added a few project photos of a summer halter top I made out of scrap fabric. I think it turned out really cute. I am definately going to try that one again in an adult size (for me and my tan)!
A.


Thursday, February 18, 2010

Nancy, I'm Sorry

I'm sorry Nancy. I have failed to create your adjustable straps. Last night I made the straps for my messenger bag and thought I would be able to finish them a la adding the adjustable thingies today. I was wrong! After watching (again) Nancy make the straps (thank God I recorded this episode), I realized that I should NOT have sewn the straps together. In order to add the fabric "adjustable tabs" the straps should only be cut and pressed. So, I can either rip out both straps and start over (insert expletives here), cut two new fabric strips, or use the straps I've already made by sewing them directly to the bag or to d-rings I'll have to install. I haven't decided what I'll do yet.


Instead of stressing over how to "fix" my bag tonight, I decided to add a few more faves to my Crafty Faves list. I've also added a link to pages showing some of my recent projects. I've only added photos of the projects. The Zakka inspired purse matches the coin purse I detailed in my second post. The pajamas were made out of flannel I bought at JoAnn's. I had a pattern for the nightgown, but I totally winged the bed jacket by using just the top portion of the robe pattern that was included with the nightgown. The kimonos were really fun to make. I hope to add Tutorial pages in the future.


Wish me luck with my straps tomorrow!


Angela