It seems like ages ago that I wrote my first sewing tutorial. It was actually in March last year that I posted a tutorial based on Nancy Zieman's adjustable fabric straps for purses and bags. I hadn't realized until relatively recently that many crafters have come to my blog and some even became "followers" after seeing my tutorial on other websites and blogs, including Craft Gossip and Totally Tutorials. So, I'm really grateful to those sites and others for re-posting this tutorial. I'm also thankful to Nancy Z. Without watching her show on my local PBS channel, I'm not sure I would have even thought that I could make my own purse, let alone adjustable straps. She is my sewing hero.
So why am I talking about this tutorial? Well, over the past year, a few people have emailed me in frustration regarding the instructions. I've tried to explain the steps via email to them, but I'm afraid these steps are best understand through pictures. I'd actually like to make a video and post it, but I'm certain I'm not to that level of blogging just yet! Carla is one of those frustrated emailers. Instead of trying to explain the steps in an email, I've decided to re-do some of the steps that are probably the most confusing and write an "updated" tutorial here. Please note that I have used fabric scraps and haven't even used matching scraps for the slides. I also have not used interfacing here, which is actually really important for successful adjustable straps. Please review the original tutorial for more detail regarding measurements, interfacing, etc. Let's get to it!
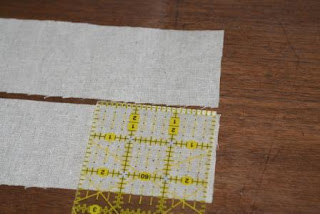
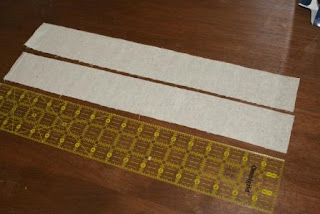
1. I first cut two pieces of fabric 2 1/2" wide X 18" long. You will also make two fabric slides. You'll want these a half (or more) narrower than your completed straps. You'll need to make sure you make them long enough to cover the width of the strap plus 1/4".
2. Next, I folded and ironed the long ends toward the middle. I did this on both straps. NOTE: You would iron interfacing to the long pieces before folding if you were making actual straps for your bag. Again, the interfacing you use here is really important. Here's an inside secret: I always use Dritz Perfect Waist Maker instead of regular interfacing for my bag straps.
3. Now fold over your strap in order to find the middle. Press to mark this spot.
4. Now, just below this fold, open the strap and measure. You are going to make your fabric slides about 1/4" longer than the width of the opened (and NOT sewn) fabric strap. In the second photo below, I'm pointing to where I will cut the green slide fabric.
5. Now, on the right side of the strap fabric (brown), pin the slide fabric (green) cut end to cut end. Sew the fabric slide to the strap fabric just where you see the pins.
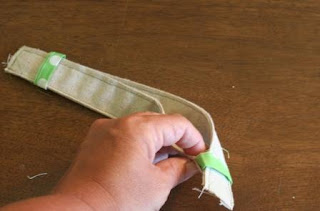
6. Once you have sewn on the slide, refold the long sides of your strap and press. Now, with wrong sides together, fold your strap in half. You will now edgestitch the strap. Sew down one long end and when you reach the fabric slide, stitch close, but do not sew over it. Then, sew down the other side of the strap. I've used green thread for this step in hopes you can see the stitches. In the last photo in this step, I am pointing to where I sewed across the strap near the slide.
7. Repeat the steps in order to make the second strap. It should look exactly like the first!
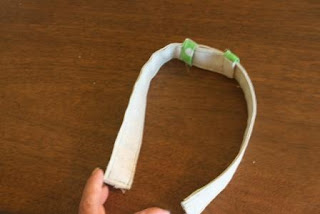
8. Now you are going to "stack" the slides. To do this, lay one strap with the top of the slide up. Take the other strap and lay it with the slide touching the table surface, or down. Look at the above photo and imagine the slide on the first strap was facing down. This is the position you'll want in order to insert one end of one strap into the slide of the other strap. Repeat for the other end.
If you've done this correctly, one slide will appear "upside down." In other words, you'll see the backside of one slide while the other will appear "right side." Now just attach your strap, which is now just one (you started with two), to your bag in whatever method you want!
I hope this all makes better sense. Study an old purse or bag that has an adjustable strap in order help you get a visual perspective, which is sometimes hard with only photos and words.


