Showing posts with label fusing plastic. Show all posts

Tuesday, November 1, 2011

Still Wild: Fusing Plastic!


In my last post, I managed to "build stitched layers" successfully!  So, next up to try out of the Sew Wild book is Fusing Plastic! Author Alisa Burke writes that "plastic bags are easy to transform with heat."  "When fused together, they create a versatile and strong surface that you can paint, alter, and use in mixed-media and sewing projects."  Burke goes on to say that she likes to use Target bags for her plastic fusing projects.  Unfortunately for me, I could only find one of these bags in my house.  What can I say?  I'm more a Walmart shopper.  I have a million Walmart bags, but these bags are mostly all white (and boring), so I decided to use a few plastic sacks from my daughter's favorite store, Justice.


The instructions for this technique begin on page 68.  There are basically 6 steps in this process.  First, collect your plastic sacks and cut the bottoms and the handles off.  Next, stack the bags on top of a scrap piece of fabric.  Smooth out any wrinkles and then place another piece of scrap fabric on top.  With your iron on low, "press slowly back and forth across the surface."  Once the pieces are fused together, remove the scrap fabric pieces and your fused plastic is "ready to stitch or paint."

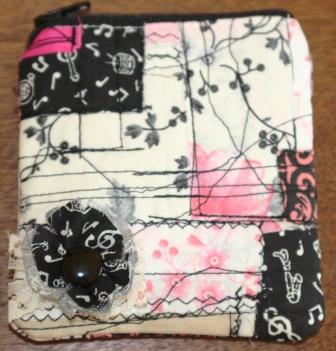
So, was it really this easy?  Yes, for the most part.  However, I think because the Justice bag plastic is heavier or thicker than that of Target or Walmart bags, the low setting on my iron didn't cut it.  I had to crank it up a bit and press relatively hard to achieve fusion.  Using a zigzag stitch and hot pink thread, I made a quick wallet using my fused plastic.


I didn't plan it, but I like how the words, "be positive" and "share your light" ended up on the inside of the wallet.  Pretty cool huh?

Okay, another Sew Wild project completed!  What's next?  How about glue resist?!  Sounds fun!

Tootles!
Blog Signature


Tuesday, October 25, 2011

Sewing Wild


Sew Wild by Alisa Burke


I've gone wild!  Well, maybe unrestrained might be a better word to describe my stitching style for the past couple of days.  A few weeks ago, I bought Alisa Burke's Sew Wild.  This book is about Burke's style, her process and "messy approach to sewing."    Throughout the first part of the book, Burke describes different surface design techniques including using paints and inks, dyes, glue and bleach.  Burke discusses different stitching tools and is a big advocate of using the darning needle, or free motion foot, on your sewing machine.  She also explores color theory and pattern.  There is also a section in the book about finding inspiration for your design.  Burke uses a variety of techniques to create several different projects, including a hat, bag, scarf, and a quilt.  Burke encourages us to Go Wild!

I decided to release my inner wild woman and create a panel of stitched layers.  This lesson begins on page 82.  Basically sew bits and pieces of fabric, in layers, on top of a background fabric.  Burke uses her own fabrics, those she has created using paints, dyes, etc.  Since I haven't created my own fabrics, I used scraps left over from my Mug Rug.  I started with about a 12" X 12" piece of muslin, backed with batting,  and then began laying out my scraps in a rough layout.


I stitched the scraps down using straight and zig zag stitches.  Next, I took smaller scraps and placed them on top, in between to fill in the spaces.  I sewed these pieces with varying stitches as well.  I got a little messy wild here.


Before I was finished, I sewed even more black lines all over the piece!  I decided to make a little bag, so I cut a square from the piece and whipped up a 4" X 4" Shabby Chic Scrap Coin Purse.  I added a little frayed edged fabric flower.  I've added this little purse to my Etsy Shop!


Although I'm pleased with my results, I must say it wasn't that easy for me to get Wild and Messy!  Don't get me wrong, I've been known to "wing" some sewing instructions and measurements, but purposely being messy is hard!  It was difficult to "let go," but it was fun.  I really like this book and will definitely try more techniques, including stenciling, masking, and monotype printing!  So, look for more posts about the projects in Sew Wild.  First up:  Fusing Plastic!  Doesn't that sound fun?!  I'm off to round up Target bags!

Tootles!
Blog Signature

P.S.  Thanks for the positive feedback regarding the Sew Loquacious Handmade Holiday.  Remember, you can add any handmade holiday post by completing the link information on the Handmade Holiday page!