Showing posts with label zipper. Show all posts

Monday, August 1, 2011

New Image Transfer Zippy Bags


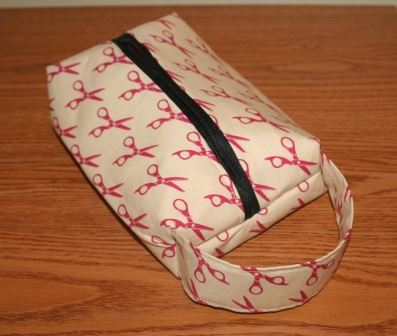
Is it Friday yet?  Wow, it's only Monday and I am so ready for the weekend!  I got a few bags completed this past Saturday and I want to get back into my sewing studio to keep it going.  I got to spend most of the day in my sewing studio.  It was so great....just me and my Janome.  I finished up a few "free-motion" bags as well as a couple of image transferred zippy bags, including the one pictured above.  I embellished the Cowgals bag with some beads and embroidery, as well as some ribbon on the bottom.  Here is a look at the back of the bag as well as the inside:


I transferred another image, this one depicting an old bicycle messenger service.  I didn't embellish this image. Instead, I "patchworked" the back of the bag.

"Adams Express"


You might recognize the fabric I used for the rear of the bag.  It's that scrumptious Etsuko Fuyura designed Echino fabric I used for my daughter's Sweet Pea purse.  Still love that fabric!

I am really pleased with how the images transferred.  I still think the results achieved using the gel medium transfer method is so much better than printing directly onto computer "fabric."  It's just more genuine, if that makes sense.  Anyway, read through my Image Transfer Tutorial and give it a try...I think you'll be really impressed!

Stay cool everyone!  It was officially 104 degrees outside as I drove home this afternoon...and I just heard tomorrow is supposed to be the hottest day of the year!!  Ugh!

Tootles!
Signature for Blog

Thursday, September 23, 2010

Dee Dee's The Winner and My Tutorial!

Thanks to all who voted for me in the Blissfull ATC Swap Holder Contest!  Sadly, I didn't win.  Aww.  Seriously, I am happy for the winner, Dee Dee!  Her holder turned out great!  Actually, we are all winners because we now have fantastic holders for our cards!  I plan on receiving a lot of ATCs because I plan on making and giving a lot of them!  So, I AM A WINNER!  And dog-gon-it, people like me!

Now, on to my computer keyboard wrist rest and the tutorial.  First, thanks to the ladies at work.  They work really hard to make me look good and I think they are definately underappreciated!  They type the letters off their keyboards and I'm sure will all be sporting those lovely carpul tunnel braces as they all get closer to their retirements!  In the meantime, thanks gals for your feedback and suggestions!  I appreciate them all!  So, let's get going already! 

Sew Loquacious Keyboard Wrist Rest Tutorial


Materials:
2      20" X 4" Inner Fabric Pieces
1      20.5" X 8.5" Outer Fabric Piece
1      22" Coordinating Zipper
Long Grain Rice
Scented Oil (optional)
Funnel
Coordinating Thread

Sewing Staples: Machine (hello), marking tools (chalk, etc), zipper foot, rotary cutter/mat or scissors, measuring tool

The Inside Story

1. Start with your inside fabric choice cut two pieces to 20" (or whatever the length of your computer keyboard) X 4"

2. Align the raw edges and pin together.

3. Measure and mark at 6 1/2" and at 13". You will be sewing vertically on these lines so you will have 3 sections.


4. Sew the two pieces together along the sides and bottom. For the top, you will sew and stop, leaving about a half an inch space in each of the 3 sections.


5. You will pour your rice into the three "holes" you've left open. After filling each section, sew closed. TIP: Don't actually FILL each section with rice. Leave enough space inside so the rice actually moves around a bit. Also, if you want your rice scented, pour your rice in a large baggie and shake a drop or two of scented oil inside the bag.  Then shake it!


The Outside

1. Lay your outside fabric rightside down and place your zipper facedown on top of it.


2. Pin the zipper to the fabric and sew it together using a zipper foot.

3. Turn it over and press. Now topstitch the fabric and zipper on the right side. (I'm not a big fan of this step, but it actually helps secure the zipper).


4. Repeat these steps (except #3) with the other long end of the fabric. Here I actually folded over about a half an inch extra fabric so that the zipper would be "hidden" or covered by fabric when completed.


5. Now make sure everything is straight and cut the zipper ends so it is even with the fabric on both short sides.

6. Open your zipper halfway and sew both short sides. If you have a label, this is when and where you would attach.


7. Trim and turn rightside out.

8. If you gave yourself extra fabric, you will now be able to fold over this excess and press it over your zipper. This is completely optional and only necessary if you don't want to see the zipper.


That's it. Now just place your 3 section rice pouch inside, zip it up and you are finished. The rice pouch can be placed in the freezer or microwave. Obviously the outside can be washed.


VOILA!

Please let me know if you make a keyboard wrist rest!  I'd love to see your photos!

Toodles for now!

Friday, June 25, 2010

Can One Have Too Many Purses?


As you know, I normally spend my Fridays shopping at flea markets, thrift stores, garage  and estate sales, as well as vintage outlets.  Today, however,  I was busy getting organized for my own garage sale!  Believe it or not, I have never had a garage sale!  I'm not sure I knew how involved it would be.  Every year my neighborhood has a "hood" sale on the same three days.  I have never participated before, but I decided to have a go this year after my next door neighbor told me she made $400 last year.  Can you believe that?  Even half that would be great for the new camera fund right?  I will keep you posted on well I do tomorrow.  I will also post any items that I don't sell tomorrow in case anyone is interested in cake decorating supplies, gumpaste cutters and molds, pans and stands, as well as vintage cake decorating books.  Sorry, I've just realized if I can clear out this stuff, I would have more room for fabric!!

 Simplicity

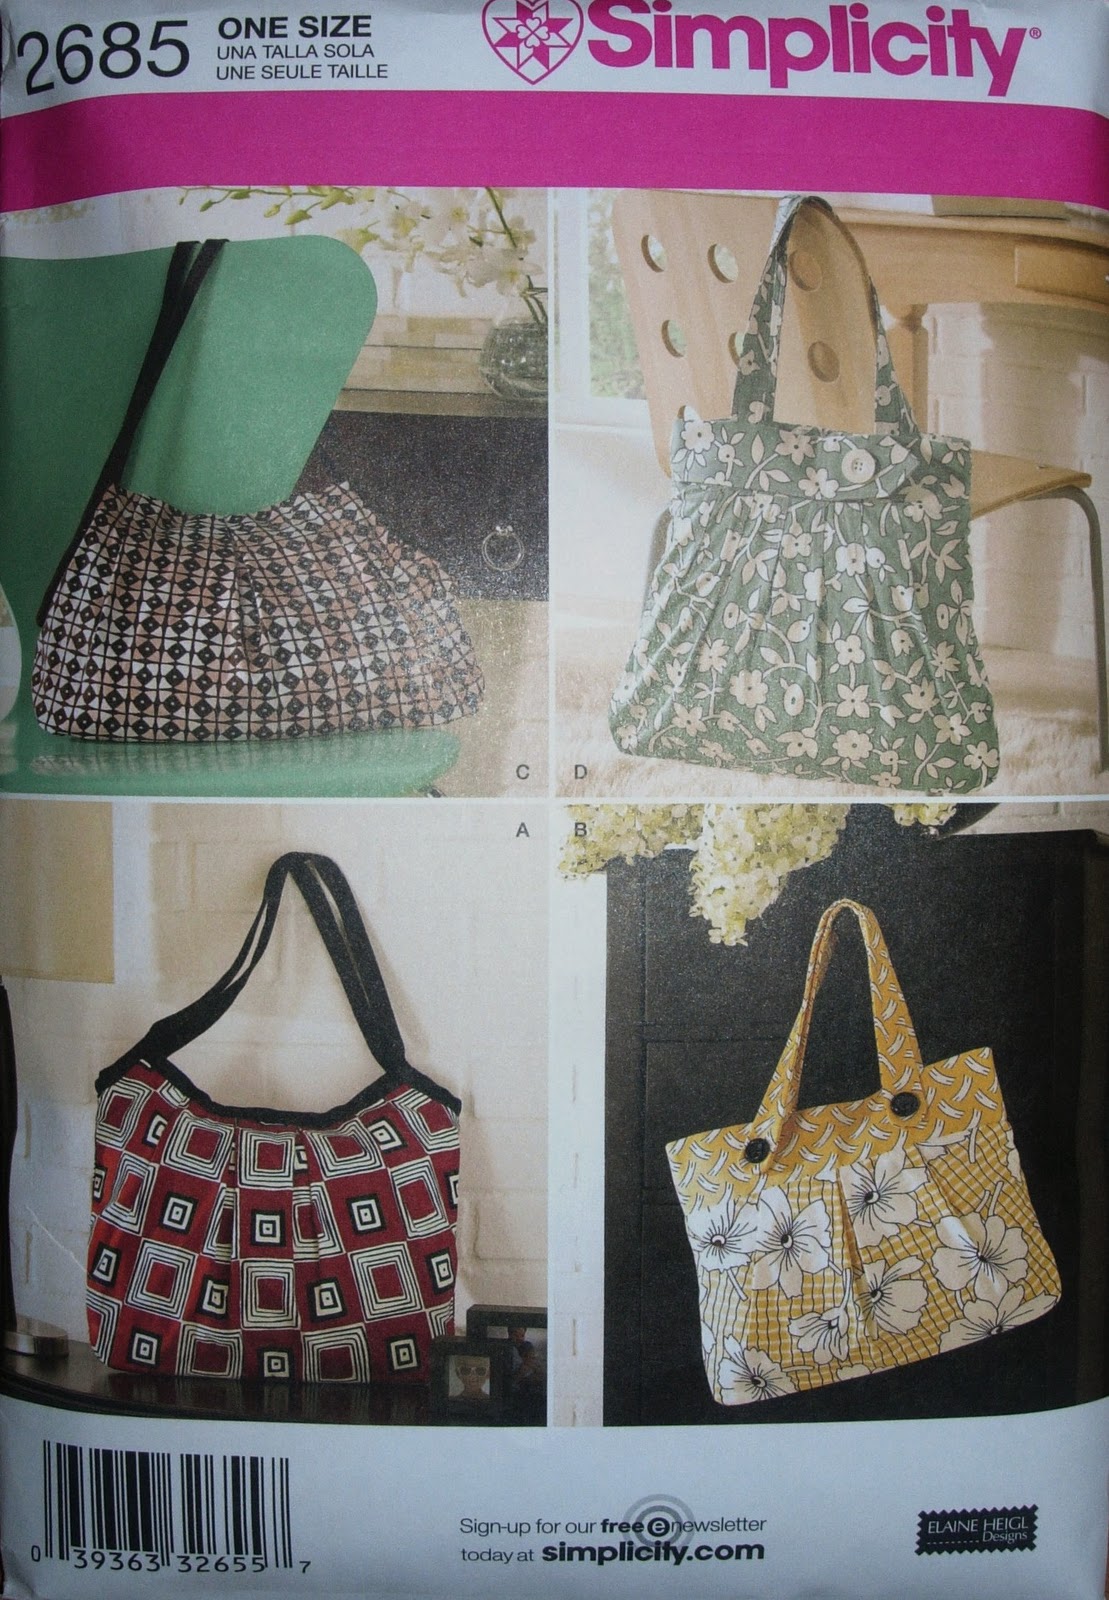
I stayed up late last night and finished the Simplicity Pleated Purse.  I am really happy with how it turned out.  I found the pattern pretty straightforward and fairly easy to follow, with the exception of the inside pocket.  Luckily, I learned how to do an inside zipper pocket when I made the black and gray purse just last week.  I actually used the zipper from the deconstructed skirt for this inside pocket.  I absolutely love the fabric and to think that the entire purse was made from the fabric of a $2.00 skirt I bought at Goodwill makes it even sweeter!  I will definately make this purse again, but maybe shorten it a bit.  As a vertically challenged person, this bag kind of hangs a bit low for me. 

Have a look at the photos and let me know what you think! 


Notice my Sew Loquacious tag?

Saturday, June 19, 2010

Sew, You're Having a Kidney Stone?

Jupiter
I've been in labor for three days.  No, I'm not having another baby, but a KIDNEY STONE the size of JUPITER!  Well, this boulder is definately not going to pass on its own, so I will be having it professionally removed next week.  Aren't I lucky?  Actually, the pain is bearable most of the time as long as I stay on top of it with the pain medication.  So, although I can't go to work while on these meds, I have managed to complete a few sewing projects in between naps.  Let me know what you think (maybe not a good idea to sew and or handle sharp objects while medicated?).

Dana's box Bag

I made this box bag for my hairdresser and friend, Dana.  I bought the fabric months ago knowing that I would make something for her with it.  I came across the tutorial for the bag at Stacy Sews Diary of a Fabric Junkie.  The directions were fairly easy to follow.  I'm sure that I will be making many more of these bags in the future!

Simplicity 2617
I also finished another purse.  I followed the   Simplicity 2617 pattern, however I did not quilt my bag.  I think it turned out pretty nice...and I managed to insert an inside zipper in the lining...a first for me!!
Inside Zipper
Oh, my "big" daughter received the black and white skirt and pink tunic top yesterday.  Suprise!  She likes them and they both fit!  As a matter of fact, she is wearing the skirt now.  Yeah!

Alright, until next time, toodles!
Angela

Monday, February 15, 2010

iPod Case for ME


So, I decided to make myself something. This is rare. When I look at fabrics I usually look at them and decide, "oh so and so would love a bag made from this," or "wouldn't this be cute on so and so?" So, I decided to make an iPod case for ME. It turned out okay, but I probably should not have quilted it. I haven't done much quilting, well, I have only quilted one thing, a bib, before. But anyway, I thought quilting would protect my iPod, so I quilted. I think the zipper turned out okay, too. This is always my issue...and I don't think I uttered any curse words with this zipper insertion. Success!


I think I will try this project again, but this time I will go for something a bit bigger...maybe the size of a Nook? hint hint....


Angela